Tuesday, September 30, 2014

Tying the Goddard Caddis

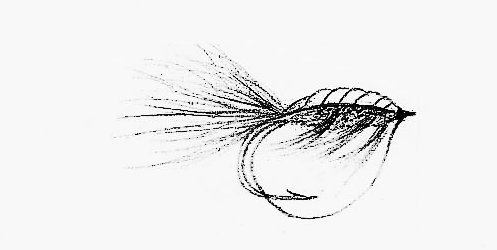
drawing of the Goddard Caddis
The Goddard Caddis
One of the most unique fly wing configuration is the clipped deer hair body of the Goddard Caddis, also called the G and H Sedge. It was named after an Englishman John Goddard and his associate Cliff Henry. It was tied to represent an adult caddis, but it can also suggest salmonflies, dobsonflies and alderflies. 

The Goddard Caddis, along with the Irresistible, are a couple of the terrestrial patterns that are tied with similar bodies. They are very high floaters and are effective in riffles and pocket water. To learn how to use the fly fishing technique of "Dapping," see my April 21, 2014, post, "Dapping the Fly."

Materials for tying the Goddard Caddis:
Hook:  94833 Nos. 10-16
Body:  Gray spun deer hair, tamped and clipped
Hackle:  Brown 
Feelers:  Brown stripped hackle stems or paint brush fibers
Thread:  Black 3/0 Monocord

drawing showing the stages of tying the Goddard Caddis
Fly Tying Stages of the Goddard Caddis

Step 1. Cut a bunch of deer hair and square off the tips. Spin the bunch forward and tamp tightly.  


Step 2. Spin a smaller bunch to 3/16 inch of the eye and also tamp it. 


Step 3. Take the fly out of the vice and trim it so that it is wedge-shaped. Put the fly back in the vice and attach the hackles. 


Step 4 One at a time, spin the hackles forward and tie them off. Attach the feelers and complete the head.  

Saturday, September 27, 2014

Tying a Fly with the Monofilament Weed Guard

Fishing in a habitat that’s cluttered with sunken logs, thick weed beds and brush pose problems with terminal tackle. To avert this problem weed guards are invaluable.

There are numerous types that are effective, but I prefer to use the monofilament loop because it quick, easy to tie and deflects off of many obstacles. For 1/0 to 2/0 hooks use 25- to 30-pound leaders. Smaller sized flies require lighter mono loops, say 15 to 20 pounds.

Following is the procedure for tying a fly I developed called Stew's Shrimp which is tied with a weed guard.

Stew's Shrimp
Materials:
Hook-TMC #6-12
Thread-Olive marabou
Shellback-Latex or Cellophane
Body-Peacock herls and olive hackle

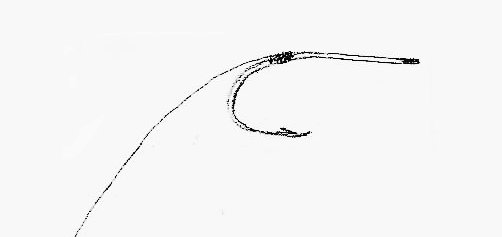
Drawing showing a 6 to 8 inch length of 25 pound leader tied in at the hook bend.
Step 1. Cut a 6- to 8-inch length of 25
pound leader and tie it in at the hook bend.

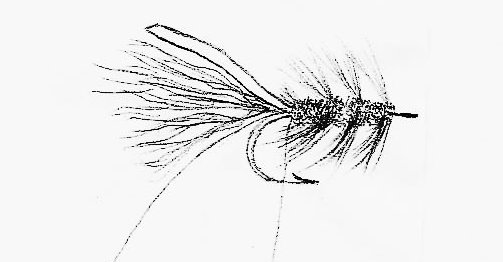
Drawing of a tail of olive marabou, a strip of latex, olive hackle and 2 peacock herls tied in at the bend of the hook.
Step 2. Tie in a tail of olive marabou, a latex
shellback, olive hackle and 2 peacock herls.
Drawing of a 3 in. strand of olive thread hanging from the hook bend with  peacock herls and hackle spiraled to hook eye.
Step 3. Tie in a 3 inch strand of olive thread and let it hang
loose below the hook. Wrap the herls forward and tie them
off 1/8 inch from the hook eye. Follow with 3-4 spirals of hackle.
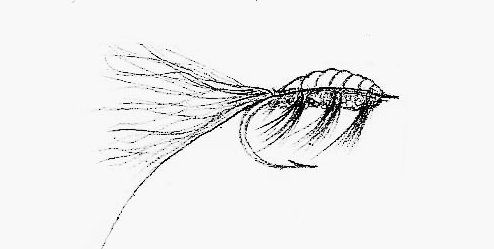
Drawing of fly after latex brought forward over back of fly with 6 wraps of olive thread spiraled forward to segment the body.
Step 4. Bring the shellback forward and secure 1/8 inch behind the eye.
Follow with 6 wraps of olive thread to form the segmented body.
Drawing of the monofilament looped under hook, level with the hook bark and up through the hook eye.
Step 5. Move the mono behind and across the hook barb.
Adjust the loop size and push it through the eye. 
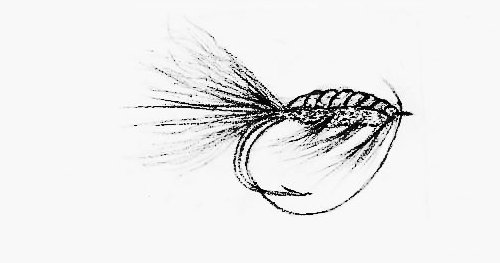
Drawing of the completed fly after the monofilament was pulled back, tied off and trimmed and the head finished.
Step 6. Pull the mono back, tie it down with 8 to 10
tight wraps and snip it off.  complete the head.

Monday, September 22, 2014

My Worst River Float Trip Ever? Guest Post by Dave Stewart

Have you ever been in that moment when you are on the verge of a major accident or when you slip and are starting to drop something really expensive? Things seem to slow down to almost super slow motion in that moment. That moment before you dump a boat in a whitewater rapid feels exactly like that.

This happened to me the first time I dumped a boat on a five day float trip through the lower Deschutes River Canyon. On that trip I learned the real power of a river and what it feels like when the rapid and current completely take control.

Picture of a drift boat floating the Deschutes River Canyon with the high desert hillside.in the background.
Floating the Deschutes River Canyon
As fly fisherman we all spend lots of time around streams and rivers. Some of us use floating devices to get to fish and some of us might even run class IV+ whitewater to get to fishing water. I find myself falling into the latter category frequently on my camping and fishing trips.

Even if you don't run class IV whitewater, this article is going to give you some useful tips that will ensure you stay upright the next time you are challenged in the river.

How Our Trip went Down

Tyler and I were on day 5 of a float trip through the lower Deschutes River Canyon. We were getting ready to drop into one of the smaller rapids on the river and were preparing as normal. This rapid has three different stages which we call upper, middle and lower. We were dropping into the first one (upper).

As we dropped down and hit the first big wave, I felt the boat continue to keep falling back until I had that realization moment of, “Oh no, we are going to dump the boat.” I thought about all of our fishing, camping and outdoor gear sinking down to the bottom of the river and gone.

After the raft flipped over on top of us, Tyler and I luckily popped up next to the boat. In the short moment we had before going into the middle section, I yelled to Tyler, “We have to flip this raft back over or we are going to lose all of our gear.”

Tyler, in a dazed state, agreed and I helped him stand up on the bottom of the raft and we worked all of our weight to help flip it over. Luckily, the 50 mph wind gusts that flipped the boat in the first place also helped flip the boat back over and saved most of our gear that was tied in.

So there we were, sitting on the bank of the river looking at a large pool below the rapid that had milk jugs and other associated cooler stuff floating on the water surface. We would walk downstream for the next mile picking up gear that had fallen out. I learned a few valuable lessons that day that I would never forget.

Picture of Dave and Doug Stewart in a drift boat on the Deschutes River with the semi-arid canyon in the background.
Dave and Doug Stewart on a float trip down the Deschutes River. 

Dangers and Lessons Learned

It is important to remember that even the most calm rivers can be extremely dangerous. People drown every year on so called “easy’”rivers because they are not prepared or just make stupid mistakes. Take a look at this link for the top 9 tips for boating to help insure you have a good trip.

Looking back on this situation I learned two big things about boating. The first was that balance in your boat is critical. We didn’t have enough weight in the front, and when we hit the big rip it just tipped us end over end.

The other big thing that I didn’t do was to prepare properly for the environmental factors. Wind can be a key factor on any Deschutes trip, and I probably should have waited out the wind in this situation. If we would have camped out another night, gotten up early and headed out before the wind picked up the next day, all would have been good.

The Irony 50 Years Earlier

Overcoming our fears are a critical part of growing as an individual. Whether it’s speaking in front of a group, sitting down for an interview or boating, confronting the fear will allow you to grow as a person. The important thing that you have to do is manage the fear and risk. You can decrease your chances of getting in trouble if you wear a life jacket, stay sober, balance the boat and stay off the river during nasty weather.

I learned a lot from my dad, Doug Stewart, and I wrote an article that discusses this transition directly. He taught me how to row, fish and manage a rapid in my life jacket. I learned from him and the mistakes he made. The ironic thing is that the only rapid he ever dumped in was the same one that I dumped in on the Deschutes. He did it about 50 years earlier at the same exact spot. Here is the link to his story of that memorable day with my grandfather.

I don’t remember how the camping was on our trip, how good the fishing was or how anything else went down. I do remember that point when I realized I was dumping my boat like it was yesterday. I learned some amazing lessons that trip that I still hold onto today and know that these can help you as well.

Conclusion

Next time you are getting ready for the big river float trip, think about what you might do when that crazy situation hits. Do you have all of the gear ready to go? Have you read the guide book or talked to someone who knows the run? Thinking about a few of these things might save your boat, your gear and maybe your life.

Dave Stewart blogs at campingstovecookout.com and can be reached at dave@campingstovecookout.com. He has also published a new ebook, A Beginner’s Guide to Camping, which you can find at his website as well. Dave would love to connect with all of the readers, so if you have a moment click over and say, "Hi."

Wednesday, September 17, 2014

My Dad never forgot this rafting and fly fishing trip on the Deschutes River!

picture of large rapids on the  Deschutes River
Deschutes River Rapids 
It was a perfect day for rafting and fly fishing--no wind, the river was in good shape and the prospect for catching Steelhead looked good. My dad, Chuck Stewart, and I were excited as we launched our 6-foot raft at Kloan about one mile above Gordon Ridge rapids. It was a tricky run because as you entered a series of minor rapids you had to carefully line the raft up to avoid a large slab of lava on the left. If you missed a few stroke on the oars, the current would quickly force you against the basalt and cause the raft to flip. Luckily, I positioned our raft in the right slot and prepared for the huge suck hole and clashing 6 foot wave that was awaiting us. 

I hit it just right, but unfortunately by dad lost his grip on the restraining rope and fell back into my lap. The raft flipped and we instantly sank out of sight in the strong rapids. Thankfully, we had tied ourselves to restraining ropes and we popped right up. We also had the forethought to tie down all of our gear. The only things we lost was a half case of beer and our confidence.

After that near disaster, my dad never really let me forget that day because he would often tell this story to his friends. He would always start out by saying, “Yeah, I’ll never forget the time my son took me rafting on the Deschutes River. He showed me how to run it from the surface right down to the very bottom!”  

Monday, September 15, 2014

Brad's Brat - An Unusual Story


Brad's Brat


This fly was introduced in 1937 by Enos Bradner, a longtime resident of the state of Washington. He was a well known fly fisher but didn’t tie flies. So he commissioned a one-armed Irish fly tier named Dan Conway to instruct him. Dan was the originator of the Conway Special. For each tying session he charged a fee of one pint of whiskey. His classes turned out to be very spirited! 

Bradner helped to establish the Washington Fly Fishing Club, and his group helped to protect the Stillaguamish River with a “fly only” regulation. The fly is an excellent summer steelhead and sea-trout fly. 

Materials:
Hook: 36890 Mustad sizes 4-6
Thread: 3/0 black
Tail: Orange and white bucktail
Body: Rear half orange wool and front red wool
Rib: Gold tinsel
Hackle: Brown
Wing: Orange over white bucktail or calftail


Step 1. Tie in orange and white bucktail. Attach the gold tinsel and orange wool.


Step 2. Wrap the wool forward 3/16 inch and attach the red wool and wrap it forward 3/16 inch.


Step 3. Wrap the gold tinsel forward and tie it off at the end of the red wool. Attach the brown hackle.


Step 4.Spiral the hackle around 2 to 3 times and tie off 1/8th inch from the hook eye.


Step 5. Match up the bucktail with the orange on top of the white and tie them in securely. Tie the head off and cement it. 

Thursday, September 11, 2014

The Halfback Nymph


Art Lindren, in his book, “Fly Patterns of British Columbia," credits John Dexheimer as the originator of this fly. It was probably developed in the late 40’s or early 50’s in B.C. and later popularized in Montana. It is similar to a Bird’s Stonefly Nymph. It’s a versatile fly that is considered by some to imitate dragonflies, damselflies, and certain mayflies. It is very effective when dead drifted during Salmonfly hatches as well as in lakes when large nymphs are emerging. A close relative of this pattern is the Fullback which is the same except for its two tied down wingcases.

Materials:
Hook: Mustad 9672 sizes 6-12
Thread: 3/0 black
Tail: Brown hackle fibers
Body: Peacock herl
Wilngcase: Dark deer hair
Hackle: Brown


Step 1. Tie in the tail and attach two peacock herls and spiral them up 1/2 of the body and tie off.


Step 2. Then attach the deer hair wing and tie in two peacock herls.


Step 3. Spiral the herls forward and tie off 1/8 inch from the hook eye. Then tie in a brown hackle.


Step 4. Spiral the hackle forward 2 to 3 times and tie off. Slightly pull the hackles back and tie off. Bring the deer directly over the top to form the wingcase.Tie off the head and cement.  

Wednesday, September 10, 2014

Attractor Flies Using Sequins

There are many different styles of attractor flies, and at certain times they can be very productive. A number of years ago I discovered a very unconventional pattern that worked very well for me. It was called the Silver Flash and was tied using sequins which are very attractive. They are ordinarily used on clothing, jewelry, bags, shoes and accessories, but I found that they also drew the attention of a variety of fish, especially salmon. Many colors are available.

Materials to tie the Silver Flash: 

Hook:  9672 Mustad, sizes 2-6
Thread:  White 3/0 Monocord
Tail:  Pearlescent Krystal Flash
Body:  Hot pink or red cactus chenille
Throat:  Pink hackle fibers
Wing:  Pink craft yarn or calftail
Sides:  Silver or pearlescent Sequins


Step 1. Cut eleven discs from the sequin strip and snip the center piece out.


Step 2. Tie in the tail and attach the sequins at the tail with 8-10 wraps. Tie chenille in at the hook bend.


Step 3. Wrap the chenille forward and grasp both ends of the sequins and pull them forward. Tie each one off on the side of hook.


Step 4. Tie in the pink throat and wing and cement the fly head. 

Thursday, September 4, 2014

Fly Tying Hooks

Hook selection can be confusing because of the odd terminology and the lack of a common standard for sizes, shapes and lengths among manufacturers. Mustad has been a reliable supplier, consistently producing high quality hooks for more than one hundred years. Their computer-controlled tempering process produces a forged hook that is stronger and more reliable than many other hooks.

Hook Anatomy
The hook gap determines the hook size, but secondary characteristics such as length, thickness and type of bend will also help one select the best hook for a given fly. Over time you’ll need to learn the reference system for the line of hooks you’ll be using. For example, a Mustad 94840 hook is a dry fly hook, a 3906 is a wet fly hook, a 37160 is a shrimp or scud hook and a 9409 is an up eye steelhead hook. Below are illustrations of the anatomy of a hook and actual hook size comparisons.
 
Hook Size Comparison Chart

Monday, September 1, 2014

Controlling Toxic Fumes

     Many head cements are made of chemical compounds that can produce harmful vapors. If you are having this problem, water-based cements can work just as well if not better than traditional lacquer cements. Other toxic products can include thinners, chemical-based paints and glues, so keep these containers well sealed when not in use. Also, you may want to work in a well-ventilated room.  

     All of these products can present another problem: after repeated use the lid on your head cement may become glued shut. To prevent this from happening, wipe off the bodkin and clean the neck of the bottle periodically. Unfortunately, you may have to use a rag saturated with solvent to clean it up, so proper ventilation may be necessary.  
Please read our terms of use policy